

Screen resolution problems in Ubuntu are more common than most guides acknowledge. The display shows the wrong resolution, your monitor’s native size isn’t listed in the dropdown, or the screen cuts off edges and forces you to scroll to reach content. These issues hit hardest on older monitors, VirtualBox and VMware virtual machines, systems running custom GPU drivers, and setups using VGA-to-HDMI adapters where EDID detection fails silently. The fix is xrandr — Ubuntu’s built-in command-line tool that lets you define, add, and apply any resolution your monitor can physically handle.
This guide covers the complete workflow: detecting your display name, calculating the correct modeline with cvt, creating and applying a custom resolution, making it persist after reboot, and handling the edge cases that most tutorials skip entirely — including what changes when running Wayland instead of X11.
Before You Start: Check Your Display Server
Ubuntu 22.04 and later use Wayland as the default display server. The classic xrandr workflow covered in this guide works on X11 (Xorg) sessions only. On Wayland, xrandr can only see the XWayland compatibility screen and cannot configure physical display outputs.
To check which display server is running, open a terminal and run:
echo $XDG_SESSION_TYPE
If the output is x11, proceed with every step in this guide. If it shows wayland, either switch to an X11 session at the login screen (click the gear icon before logging in and select Ubuntu on Xorg), or use the GNOME Displays GUI under Settings → Displays, which works on both display servers.
Step 1: Identify Your Display Name with xrandr
Open a terminal with Ctrl + Alt + T and run:
xrandr
The output lists every connected display and all resolutions currently available for each. The active resolution is marked with an asterisk (*). The preferred resolution (from your monitor’s EDID) is marked with a plus (+). Immediately after the command runs, look for the display device name — it appears before the resolution list. Common names are VGA-0, VGA-1, HDMI-1, HDMI-2, DP-1 (DisplayPort), and eDP-1 (built-in laptop display). Write down the exact name — capitalization matters.
If your target resolution is already listed, skip to Step 4 and apply it directly with xrandr –output [name] –mode [resolution]. If it is missing, continue from Step 2.
Step 2: Calculate the Modeline with CVT
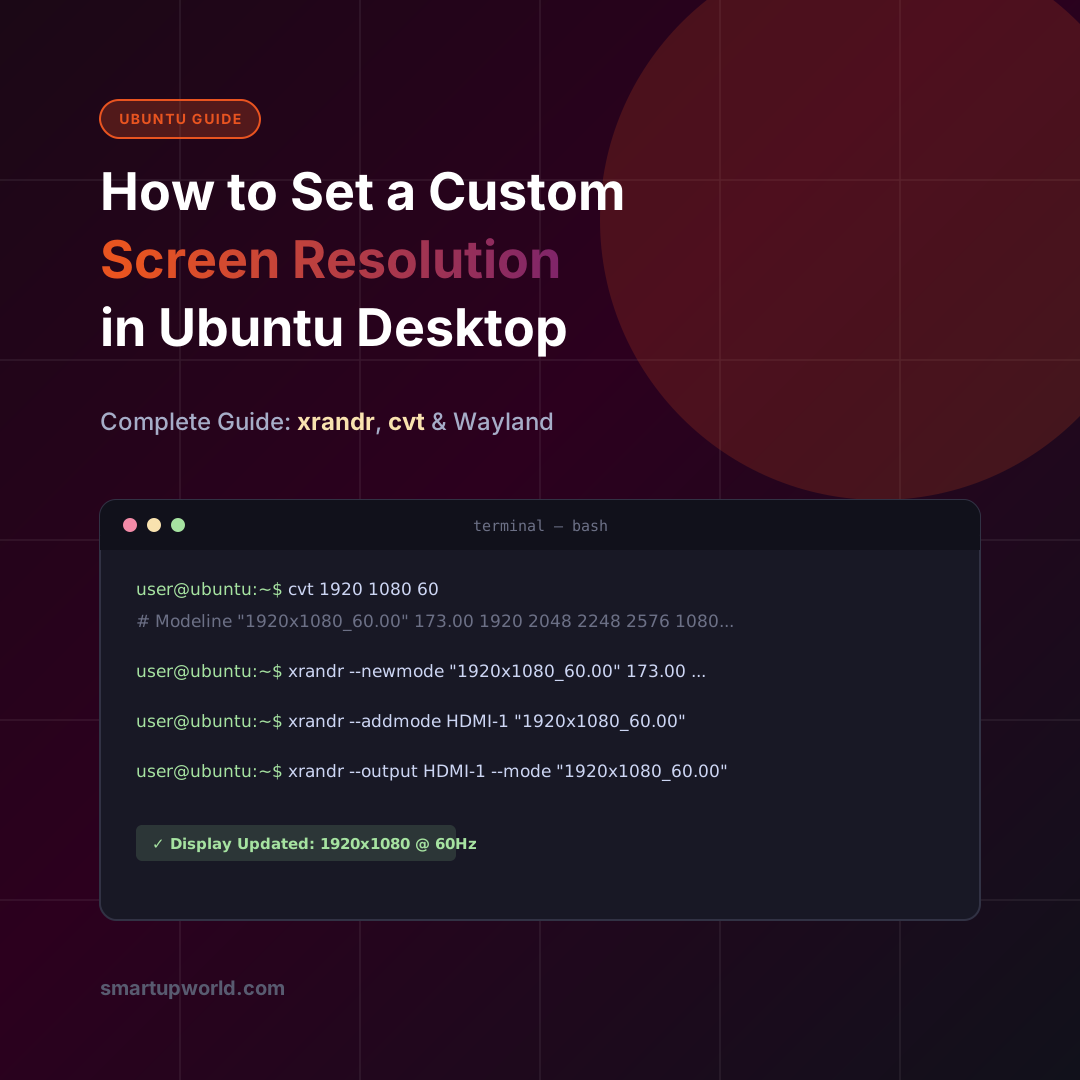
The cvt utility calculates VESA Coordinated Video Timing parameters — the exact signal values xrandr needs to drive a monitor at a specific resolution and refresh rate. Run it with your target width and height. For 1366×768 at 60Hz:
cvt 1366 768
The output will look like this:
# 1368x768 59.88 Hz (CVT) hsync: 47.79 kHz; pclk: 85.25 MHz

Modeline "1368x768_60.00" 85.25 1368 1440 1576 1784 768 771 781 798 -hsync +vsync
Copy the entire Modeline string — everything starting from the quoted resolution name through the final +vsync. Note that CVT rounds 1366 to 1368 for signal compatibility; this is expected and the display will render correctly at your target resolution. For other common resolutions:
1920×1080 at 60Hz: cvt 1920 1080
1600×900 at 60Hz: cvt 1600 900
1280×1024 at 60Hz: cvt 1280 1024
2560×1440 at 60Hz: cvt 2560 1440
Step 3: Create the New Resolution Mode
Use the Modeline values from Step 2 to register a new mode with xrandr. The command uses –newmode followed by the quoted name and all timing parameters:
xrandr --newmode "1366x768_60.00" 85.25 1368 1440 1576 1784 768 771 781 798 -hsync +vsync
Replace the values after –newmode with the exact output from your cvt command — do not copy the values above verbatim unless your target resolution is 1366×768. Each monitor requires its own calculated values. If the command returns a BadName error, the mode name already exists in the X server’s mode list. Either use a different name or remove the existing mode first with xrandr –delmode [display] “[name]” then xrandr –rmmode “[name]”.
Step 4: Add the Mode to Your Display
With the mode registered, link it to your specific display output using –addmode:
xrandr --addmode VGA-0 "1366x768_60.00"
Replace VGA-0 with your display name from Step 1, and the quoted name with whatever you used in Step 3. A BadMatch error at this stage usually means the timing values are incompatible with what the driver expects for that output — try running cvt with a reduced refresh rate (cvt 1366 768 50) or confirm the display name is correct.
Now apply the new resolution:
xrandr --output VGA-0 --mode "1366x768_60.00"
The screen will switch immediately. If the display goes blank or shows “out of range,” Ubuntu will automatically revert within about 15 seconds. If it does not, switch to a text console with Ctrl + Alt + F3, log in, and run xrandr –output VGA-0 –auto to restore the previous resolution.
Alternatively, open Settings → Displays and select the new resolution from the dropdown — it will now appear in the list.
Step 5: Make the Resolution Permanent After Reboot
xrandr changes are session-only by default. Two reliable methods exist to persist a custom resolution across restarts.
Method 1: Use ~/.profile
Open your profile file in a text editor:
nano ~/.profile
Add the following three lines at the bottom, substituting your actual values:
xrandr --newmode "1366x768_60.00" 85.25 1368 1440 1576 1784 768 771 781 798 -hsync +vsync

xrandr --addmode VGA-0 "1366x768_60.00"

xrandr --output VGA-0 --mode "1366x768_60.00"
Save with Ctrl + O, then Enter, then exit with Ctrl + X. This file runs on every user login.
Method 2: Use /etc/profile.d/ (system-wide)
For system-wide persistence across all users, create a dedicated script in the profile.d directory:
sudo nano /etc/profile.d/custom-resolution.sh
Add the same three xrandr commands, save, and exit. This method is particularly useful on shared machines or kiosk setups where the resolution must be enforced regardless of which user logs in.
Ubuntu Screen Resolution on Wayland
Since Ubuntu 22.04 defaulted to Wayland, the xrandr workflow no longer applies to Wayland sessions directly. On Wayland, display configuration is managed by the compositor. For GNOME on Wayland, resolution changes go through Settings → Displays, which saves configuration automatically to ~/.config/monitors.xml — no manual persistence steps needed.
For HiDPI displays on Wayland, fractional scaling can be enabled via terminal:
gsettings set org.gnome.mutter experimental-features "['scale-monitor-framebuffer']"
This unlocks intermediate scaling options (125%, 150%, 175%) in the Displays panel. For KDE Plasma on Wayland, resolution and scaling are managed through System Settings → Display and Monitor, which also saves automatically.
Users running Hyprland or other wlroots-based compositors can use wlr-randr, a Wayland-native equivalent of xrandr, to set resolutions from the command line.
Ubuntu Screen Resolution on VirtualBox and VMware
VMs are the most common source of custom resolution requests in Ubuntu. When the GNOME Displays panel only shows low resolutions like 800×600 or 1024×768, the xrandr workflow described in this guide applies directly — but the display name is almost always Virtual1 on VirtualBox and Virtual-1 on VMware.
For VirtualBox, the preferred fix is installing Guest Additions (sudo apt install virtualbox-guest-additions-iso), which enables automatic resolution matching to the host window size. If Guest Additions are already installed and resolution is still wrong, fall back to the manual xrandr method. For VMware, open-vm-tools handles the same function: sudo apt install open-vm-tools-desktop.
Common xrandr Errors and How to Fix Them
xrandr: cannot find output “VGA-0”
The display name in your command does not match what xrandr reports. Run xrandr without arguments to see the exact name, including capitalization and number. On some systems the output is VGA1 instead of VGA-0, or HDMI-A-1 instead of HDMI-1.
X Error of failed request: BadMatch
The mode timing values are not accepted by the driver for that output. This happens frequently with NVIDIA proprietary drivers, which handle mode validation differently from the open-source nouveau driver. Switching to the open-source driver, or using NVIDIA Settings instead of xrandr, typically resolves it.
Screen flickers after applying custom resolution
A mismatch between the calculated refresh rate and what the monitor actually supports. Re-run cvt at a lower refresh rate (50Hz or 56Hz instead of 60Hz) and repeat the newmode and addmode steps with the updated values.
Resolution resets after logout but not reboot
The commands in ~/.profile are only applied after a full login shell is established. If the display manager applies resolution before the profile runs, add the commands to ~/.xprofile instead, which is read earlier in the X session startup sequence.
xrandr shows only one resolution on Ubuntu 22.04 or later
This indicates a Wayland session. xrandr cannot configure physical Wayland outputs. Log out, select “Ubuntu on Xorg” from the login screen gear menu, and log back in to use the xrandr workflow.
Tools and Software for Managing Ubuntu Screen Resolution
ARandR
ARandR is a free, open-source graphical front end for xrandr that makes display configuration accessible without needing to memorize command-line syntax. It shows monitor positions visually and lets users drag and rearrange them, set resolutions, adjust refresh rates, and save configurations as executable shell scripts that can be bound to keyboard shortcuts or loaded on startup. ARandR is particularly useful for multi-monitor setups where positioning matters. It does not support creating entirely new custom modes (that still requires the xrandr CLI), but it handles all standard resolution switching with a clean GTK interface. Install via sudo apt install arandr. ARandR is completely free with no pricing tier — it is distributed as open-source software. It works only on X11 sessions.
- Free, open-source, available in Ubuntu repositories
- Drag-and-drop monitor positioning with edge snapping
- Saves configurations as shell scripts for easy reuse
- Supports output rotation, refresh rate selection, and mirroring
- Works with all standard xrandr-compatible outputs
xlayoutdisplay
xlayoutdisplay is a command-line tool that automatically detects and arranges displays based on the highest available refresh rate, actual DPI, and laptop lid state. Unlike xrandr, which requires users to specify every parameter manually, xlayoutdisplay reads your connected displays and applies sensible defaults intelligently. It is designed to be called from .xinitrc or triggered when plugging or unplugging monitors, making it ideal for laptop users who frequently switch between docked and undocked configurations. The tool handles DPI calculation correctly — a gap most display tools ignore entirely. xlayoutdisplay is free and open-source, available via the Arch AUR (xlayoutdisplay) and buildable from source on Ubuntu. It runs on X11 only.
- Auto-detects connected displays and applies optimal settings
- Correctly calculates and applies physical DPI per monitor
- Handles laptop lid state detection automatically
- Ideal for .xinitrc integration and hotplug scripts
- Selects highest available refresh rate without user input
wlr-randr
wlr-randr is the Wayland equivalent of xrandr for compositors built on wlroots — including Hyprland, Sway, and River. On these compositors, wlr-randr can list available modes, set resolutions, change refresh rates, apply scaling factors, and toggle outputs on or off — everything xrandr does on X11. It is particularly valuable for users who have migrated to Wayland-native environments but want the same scriptable resolution control they had under X11. Note that wlr-randr does not work with GNOME (Mutter) or KDE Plasma (KWin), which are not based on wlroots. wlr-randr is free and open-source, installable from source or via distro packages where available.
- Wayland-native xrandr equivalent for wlroots compositors
- Supports resolution, refresh rate, scaling, and output toggle
- Scriptable — identical workflow to xrandr for automation
- Works with Hyprland, Sway, River, and other wlroots compositors
- Free and open-source with active development
kscreen-doctor (KDE)
kscreen-doctor is KDE Plasma’s command-line display configuration tool, part of the libkscreen library. On both X11 and Wayland sessions in KDE Plasma, it provides scriptable resolution changes, refresh rate control, output arrangement, and scaling — covering everything xrandr handles, but with native KDE Wayland support. The typical workflow is running kscreen-doctor –outputs to list display names and modes, then applying a target mode with kscreen-doctor output.HDMI-1.mode.1920×1080@60. Settings applied through kscreen-doctor persist automatically via KDE’s display configuration system. kscreen-doctor is free, open-source, and ships with KDE Plasma by default — no separate installation needed on KDE-based Ubuntu flavors like Kubuntu.
- Works on both X11 and Wayland in KDE Plasma
- Persistent — settings are saved automatically by KDE
- Scriptable with clean mode-selection syntax
- Included by default in Kubuntu and KDE neon
- Supports resolution, refresh rate, rotation, and scaling
gnome-randr (GNOME Wayland)
gnome-randr is a command-line tool that bridges the gap for GNOME Wayland users who need scriptable resolution control. GNOME on Wayland does not expose xrandr-compatible interfaces, so tools like xrandr and ARandR cannot configure physical displays. gnome-randr communicates directly with GNOME’s Mutter compositor via D-Bus to read and apply display settings, using syntax similar to xrandr. The command gnome-randr modify –mode 1920×1080@60 HDMI-1 applies a resolution change that persists through GNOME’s ~/.config/monitors.xml file. gnome-randr is free and open-source, available from its GitHub repository. It fills a critical gap for GNOME Wayland users who want the same scripting capability that xrandr provides on X11.
- Wayland-compatible resolution tool specifically for GNOME
- xrandr-like syntax for easier transition from X11
- Communicates with Mutter compositor via D-Bus
- Settings persist via GNOME’s monitors.xml configuration
- Free and open-source
GNOME Displays (Built-in Settings)
The GNOME Displays panel under Settings is Ubuntu’s built-in resolution management tool and the only option that works natively on both X11 and Wayland sessions without any additional installation. It presents all detected resolutions in a dropdown, applies changes with a 20-second revert countdown so users can recover from incompatible settings, and saves the configuration automatically on confirmation. For standard resolutions that the monitor reports via EDID, GNOME Displays is the fastest path. It does not support adding custom resolutions not reported by the hardware — that still requires the xrandr CLI on X11 or a Wayland equivalent tool. GNOME Displays is free and ships with every Ubuntu Desktop installation.
- Built-in, no installation needed on Ubuntu Desktop
- Works on both Wayland and X11 sessions
- 20-second auto-revert countdown prevents display lockouts
- Automatic configuration persistence via monitors.xml
- Supports multi-monitor layout, rotation, and refresh rate
NVIDIA X Server Settings (nvidia-settings)
For Ubuntu systems running NVIDIA proprietary drivers, nvidia-settings is the most reliable display configuration tool. The standard xrandr workflow frequently fails with NVIDIA drivers — specifically the BadMatch error when adding custom modes — because NVIDIA’s driver validates modes differently from open-source drivers. nvidia-settings handles this internally and exposes custom resolution creation through its Displays section. It also controls advanced GPU-specific options that xrandr cannot access: refresh rate override, GPU scaling modes, underscan/overscan adjustment, and color output format (RGB vs YCbCr). nvidia-settings is free and installable via sudo apt install nvidia-settings. It requires the NVIDIA proprietary driver package to function.
- Fully compatible with NVIDIA proprietary drivers on X11
- Custom resolution creation without BadMatch errors
- GPU-level overscan and underscan adjustment
- Color output format control (RGB, YCbCr 4:2:2, 4:4:4)
- Free, installs with NVIDIA driver package
Resolution Switcher (GNOME Extension)
For users who need to switch between multiple resolution presets frequently — such as switching between 1080p for daily use and 720p for screen recording — resolution-switching GNOME Shell extensions provide a quick-access toolbar button. These extensions sit in the GNOME top bar and cycle through predefined resolutions with a single click, without opening Settings or running terminal commands. They operate by calling xrandr in the background on X11 sessions. Installation is through the GNOME Extensions website (extensions.gnome.org) or the Extensions Manager app. Most are free and open-source, though functionality on Wayland varies by extension.
- One-click resolution switching from the top bar
- Define multiple presets for rapid switching
- No terminal needed after initial configuration
- Free, installed via GNOME Extensions Manager
- X11 sessions have full support; Wayland varies by extension
KScreen (KDE Display Management)
KScreen is KDE Plasma’s full display management system, providing both the GUI settings panel visible in System Settings → Display and Monitor, and the background daemon that automatically applies saved display profiles when monitors are connected or disconnected. On Kubuntu and other KDE-based Ubuntu flavors, KScreen handles everything from resolution to refresh rate, monitor layout, HDR, and per-display color profiles. Its strongest feature is profile memory: plug in the same external monitor and KScreen applies the saved resolution and position immediately without any user interaction. KScreen supports both X11 and Wayland sessions natively. It ships pre-installed on all KDE Plasma environments and is completely free.
- Automatic display profile recall when monitors connect
- Full support for X11 and Wayland on KDE Plasma
- Per-display color profile management
- HDR and high refresh rate support on compatible hardware
- Pre-installed on Kubuntu — no separate setup required
autorandr
autorandr is a command-line utility that automatically detects connected displays and applies the correct xrandr configuration from a set of saved profiles. The workflow: set up the desired resolution and layout manually with xrandr, run autorandr –save [profile-name] to save the current state, and from that point forward autorandr detects when those monitors are connected and applies the matching profile automatically. It handles common scenarios like switching between a laptop-only profile, a docked dual-monitor profile, and a presentation projector profile without any manual steps. autorandr is free, open-source, and installable via sudo apt install autorandr on Ubuntu. It works on X11 sessions and integrates with udev for hotplug detection.
- Automatic resolution profile switching on monitor connect/disconnect
- Save unlimited named profiles for different display setups
- udev integration for hotplug detection without user action
- Systemd service support for reliable startup application
- Free, open-source, available in Ubuntu repositories
Frequently Asked Questions
Why doesn’t my target resolution appear in Ubuntu’s display settings?
Ubuntu’s Displays panel only shows resolutions reported by the monitor via EDID — the identification data the monitor sends to the system. When EDID detection fails, is incomplete, or reports wrong capabilities (common with VGA adapters, KVM switches, HDMI-to-VGA converters, and some VMs), only a limited set of generic resolutions appears. The xrandr custom resolution method bypasses EDID entirely and forces any resolution the monitor can physically accept.
Does the xrandr custom resolution method work on Ubuntu 22.04 and 24.04?
Yes, but only on X11 sessions. Ubuntu 22.04 made Wayland the default, so new installations launch Wayland by default. To use xrandr, select “Ubuntu on Xorg” at the login screen before logging in. On X11, the xrandr workflow functions identically on Ubuntu 18.04, 20.04, 22.04, and 24.04 LTS.
CVT output shows 1368 instead of 1366 — will the resolution display correctly?
Yes. CVT rounds 1366 to 1368 because 1366 is not evenly divisible by 8, which VESA timing standards require. The actual pixels rendered on screen correspond to the monitor’s panel width. The display will look identical to a proper 1366×768 output despite the timing parameters referencing 1368.
How do I remove a custom resolution I added with xrandr?
First switch away from the custom resolution: xrandr –output VGA-0 –auto. Then delete the mode from the output: xrandr –delmode VGA-0 “1366x768_60.00”. Finally remove the mode definition: xrandr –rmmode “1366x768_60.00”. Also remove the corresponding lines from ~/.profile or /etc/profile.d/ to prevent recreation on next login.
Why does xrandr give a BadMatch error when adding a custom mode?
BadMatch at the –addmode step means the driver is rejecting the timing parameters for that specific output. The three most common causes are: running the NVIDIA proprietary driver (use nvidia-settings instead), trying to add a resolution beyond the output’s maximum pixel clock, or a display name mismatch between the –newmode and –addmode commands. Recalculating with a lower refresh rate using cvt [width] [height] 50 resolves most BadMatch errors from overclock pixel clock limits.
Can a custom resolution set with xrandr damage the monitor?
Modern monitors have built-in protection circuits that refuse to display signals outside their supported range — the screen will go blank and show “out of range” rather than accepting a harmful signal. However, applying a refresh rate significantly higher than the monitor’s rated maximum to older CRT monitors can cause hardware stress. For LCD, LED, and modern flat-panel displays, the monitor’s protection handles out-of-range signals safely. Always stay within the manufacturer’s stated horizontal sync and vertical refresh rate specifications when calculating modelines.
Pro Tips for Ubuntu Screen Resolution Management
Always run xrandr without arguments before attempting any resolution change. The output shows the exact display names, current mode, and which resolutions are already available — spending 30 seconds reading it prevents most errors that follow from incorrect assumptions about display names or available modes.
When a custom resolution works but flickers at 60Hz, recalculate the modeline with a reduced refresh rate using cvt [width] [height] 56 or cvt [width] [height] 50. Some monitors — particularly older TFTs and VGA-connected displays — report 60Hz capability in EDID but produce cleaner, stable output at 56Hz due to lower pixel clock requirements.
For VirtualBox specifically, check running processes to confirm the VirtualBox Guest Additions service is active before attempting manual xrandr resolution changes. Guest Additions set to vboxadd running means the VM should handle resolution automatically — if it is not, reinstall Guest Additions rather than fighting xrandr manually in a VM environment where the display driver can interfere with custom modes.
Save working xrandr configurations to named shell scripts rather than only adding them to ~/.profile. A script at ~/scripts/set-resolution-1080p.sh that contains the three xrandr commands can be executed manually, bound to a keyboard shortcut, or called from autorandr profiles — giving far more flexibility than a single profile entry that runs at login only.
When switching Ubuntu machines or reinstalling, the display name in xrandr commands almost certainly changes. VGA-0 on one system may be VGA-1 on another with a different motherboard or GPU. Always re-run xrandr after a fresh install or hardware change before assuming the old commands will work.
On Wayland, avoid the instinct to switch to X11 just for xrandr. GNOME’s Displays panel covers the vast majority of standard resolution needs with automatic persistence. The xrandr workflow adds genuine value for custom resolutions below or outside EDID-reported capabilities — but for changing between listed resolutions, the GUI is faster and more reliable on Wayland sessions.
For multi-monitor setups where one display handles a custom resolution and another uses a standard one, test each display independently before combining them in a single Ubuntu version-specific xrandr command. Combining multiple –output flags in one command is more efficient but harder to debug — isolated testing first identifies which display is causing issues when a combined command fails.
When the custom resolution persists in ~/.profile but fails to apply after reboot on some sessions, add a sleep 2; prefix before each xrandr command. A timing race between the X server initialization and the profile script execution causes intermittent failures on some hardware — the two-second delay resolves it consistently: sleep 2; xrandr –newmode…
Wrapping Up
Setting a custom screen resolution in Ubuntu comes down to four commands: xrandr to identify the display, cvt to calculate the timing values, xrandr –newmode and –addmode to register the resolution, and xrandr –output –mode to apply it. Persistence is a fifth step — adding those commands to ~/.profile or a script in /etc/profile.d/ ensures the resolution survives reboots.
The one critical constraint to keep in mind: the xrandr workflow applies to X11 sessions only. Ubuntu 22.04 and later default to Wayland, which requires using GNOME Displays for standard resolutions or a Wayland-compatible tool like gnome-randr, wlr-randr, or kscreen-doctor depending on the desktop environment. For NVIDIA users, nvidia-settings handles custom resolutions more reliably than xrandr. For users who connect external monitors regularly, connecting a laptop to a monitor combined with autorandr for automatic profile switching eliminates the need to run any commands manually after the initial setup.
Screen resolution management on Ubuntu has genuinely improved with modern Wayland support — but the xrandr method remains the definitive solution for edge cases, unsupported monitors, VMs, and hardware where EDID detection falls short.

Loading comments…