

In today’s fast-paced work environment, managing communications effectively is crucial, especially when you’re away from your desk. Automatic replies in Microsoft Outlook provide a seamless way to inform colleagues and clients about your absence, ensuring that important messages are acknowledged promptly. This feature, often referred to as out of office or OOF, allows you to customize messages, schedule responses, and even differentiate between internal and external recipients. Whether you’re on vacation, attending a conference, or simply focusing on a project, setting this up can prevent misunderstandings and maintain professionalism.
The process varies slightly depending on the version of Outlook you’re using, but the core functionality remains consistent across platforms. By enabling automatic replies, you can set specific time frames for when the messages should be sent, include contact information for urgent matters, and even block your calendar to avoid scheduling conflicts. This not only saves time but also helps in managing expectations from senders. Understanding how to configure these settings properly ensures that your email system works efficiently in your absence.
Before diving into the steps, it’s important to note that automatic replies are typically available for accounts connected to Microsoft Exchange Server, Office 365, or Microsoft 365. For POP or IMAP accounts like Gmail or Yahoo, you might need to use rules to simulate similar behavior. This guide covers setups for various Outlook interfaces, including desktop applications, web versions, and mobile apps, to provide a comprehensive overview.
Preparing your Outlook account involves checking your email settings and ensuring you have the necessary permissions. If you’re part of an organization, your IT department might have policies governing automatic replies, such as message content restrictions or approval processes. Familiarizing yourself with these guidelines beforehand can prevent any issues. Additionally, testing your setup by sending a sample email to yourself or a colleague is a good practice to verify that the reply is sent as intended.
Setting Up Automatic Replies in Outlook for Windows (Classic Version)
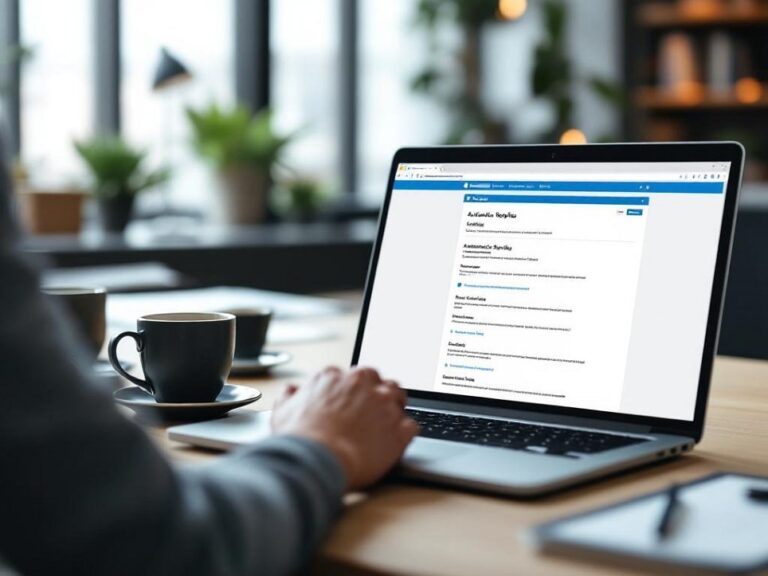
The classic Outlook for Windows offers a straightforward interface for configuring automatic replies. This version is commonly used in professional settings and provides robust options for customization. To begin, open your Outlook application and navigate to the main window where your inbox is displayed. Ensure you’re signed in to the account for which you want to set the replies.
Click on the File tab located in the upper left corner of the screen. This opens the backstage view where you can access account information and settings. From there, select Automatic Replies (Out of Office). If this option isn’t visible, it might indicate that your account type doesn’t support it directly, and you’ll need to use rules instead.
In the Automatic Replies dialog box, check the box labeled Send automatic replies. Here, you can specify a time range by selecting Only send during this time range and entering the start and end dates and times. This is particularly useful for planned absences like holidays or business trips. Without setting a range, the replies will continue until manually turned off.
Next, compose your message in the Inside My Organization tab for internal recipients. Keep it concise yet informative, including details like your return date and alternative contacts. For external senders, switch to the Outside My Organization tab and decide whether to reply to My Contacts only or to Anyone outside my organization. This helps control spam and unnecessary responses.
After crafting your messages, click OK to save the changes. Outlook will now automatically send the replies based on your settings. Remember to turn off the feature upon your return by reopening the dialog and selecting Do not send automatic replies.
Customizing Messages and Advanced Options
For more advanced customization, you can format your reply text using bold, italics, or hyperlinks. Include emergency contact information or direct senders to a shared mailbox. If you need to reply to specific groups, consider combining this with Outlook rules for finer control.
One useful advanced feature is the ability to decline meeting invitations automatically during your absence. This can be enabled in the Automatic Replies settings, helping to keep your calendar clear. Additionally, you can change your presence status in Microsoft Teams if integrated, to reflect your out-of-office state.
Configuring Automatic Replies in the New Outlook for Windows
The new Outlook for Windows introduces a modern interface with streamlined settings. To access automatic replies, click the gear icon in the upper right corner to open Settings. Navigate to Accounts and then select Automatic Replies from the menu.
Toggle on Turn on automatic replies. If you have multiple accounts, ensure the correct one is selected. Enter your message in the provided field, and optionally set a start and end time. You can also choose to send a different reply to people outside your organization.
Additional options include blocking time on your calendar and automatically declining new and existing meeting requests. This integration with your calendar ensures that your schedule remains protected during your absence. Once configured, save your changes to activate the feature.
Tips for Effective Message Composition
When writing your automatic reply, aim for clarity and brevity. Start with a polite greeting, state your absence period, provide alternative contacts if applicable, and end with a professional sign-off. Avoid sharing sensitive information like your exact location for security reasons.
Setting Up Out of Office in Outlook for Mac
Outlook for Mac users can access automatic replies through a similar process. Open the application and click on the File menu at the top. Select Automatic Replies from the dropdown. If the option is grayed out, check your account type or consult your administrator.
Enable Send automatic replies and set the time range if needed. Compose your internal message in the main field, then select the Outside My Organization tab for external replies. Format the text as desired and click OK to apply.
For Mac-specific features, note that integration with macOS notifications can alert you to setup confirmations. If using multiple accounts, repeat the process for each one individually.
Differences from Windows Versions
While the steps are comparable, Mac users might encounter slight interface variations, such as menu placements. The formatting toolbar is consistent, allowing rich text edits. Ensure your Outlook is updated to the latest version for optimal performance.
Enabling Automatic Replies in Outlook on the Web
For those using Outlook through a browser, sign in to your account at outlook.office.com. Click the gear icon for Settings, then go to Mail and select Automatic replies under the General section.
Turn on Automatic replies on and set your time period. Type your message for internal and external recipients separately if required. You can also add rules for more complex scenarios directly from this interface.
This web version is ideal for quick setups when away from your primary device. It syncs across all platforms connected to the same account, ensuring consistency.
Integration with Other Microsoft Services
Outlook on the web integrates seamlessly with OneDrive and Teams. Your out-of-office status can update in Teams, notifying team members. This holistic approach enhances communication within Microsoft ecosystems.
Setting Up Out of Office in the Outlook Mobile App
The Outlook app for iOS and Android provides mobile-friendly settings. Open the app, tap the home icon in the top left, then the gear for Settings. Select your account and tap Automatic Replies.
Toggle the switch to on, set the duration, and enter your message. Options for internal and external replies are available, similar to desktop versions. This is convenient for last-minute setups on the go.
For Android users, ensure notifications are enabled to confirm activation. iOS integration with Focus modes can complement your out-of-office setup by silencing alerts.
Mobile-Specific Considerations
Mobile setups might have limitations in formatting compared to desktop, but basic text and links work well. Test by sending an email from another account to verify receipt of the reply.
Using Rules for Non-Exchange Accounts
If your account doesn’t support automatic replies natively, use Outlook rules. Go to File > Manage Rules & Alerts in the classic version. Create a new rule, select Apply rule on messages I receive, and add conditions if needed.
Under actions, choose Reply using a specific template. First, create and save a template message via New Email > Save As > Outlook Template. Then, link it in the rule.
Enable the rule and ensure it’s set to run automatically. This simulates out-of-office replies for POP/IMAP accounts like Gmail.
Creating and Managing Templates
Templates allow reusable messages. Save them in the default templates folder for easy access. Update them as needed for different absences.
Troubleshooting Common Issues
If automatic replies aren’t sending, check your account type and server settings. Ensure Outlook is online and not in cached mode if applicable. Restart the application or check for updates.
Another issue is replies going to spam; advise recipients to check their junk folders. If messages loop, adjust rules to exclude automatic replies.
For organizational accounts, permissions might restrict features; contact IT support. Verify time zones for scheduled replies to avoid mismatches.
Common Mistakes to Avoid
- Forgetting to turn off replies upon return, leading to unnecessary messages. Set a reminder or use scheduled end times.
- Sharing too much personal information, which could pose security risks. Stick to essential details like return date and contacts.
- Not testing the setup, resulting in undiscovered errors. Always send a test email.
- Ignoring external reply options, potentially sending sensitive info to outsiders. Use My Contacts only when appropriate.
- Overlooking calendar integration, causing scheduling conflicts. Enable auto-decline for meetings.
- Using outdated versions of Outlook, missing new features. Keep software updated.
- Not customizing for different audiences, leading to irrelevant responses. Tailor internal and external messages.
- Failing to include alternative contacts, delaying urgent matters. Provide clear escalation paths.
Best Practices for Out of Office Messages
Craft messages that are professional and helpful. Include your name, position, absence reason briefly, return date, and emergency contacts. Use positive language to maintain good relations.
Consider cultural sensitivities if dealing with international contacts. Keep messages concise to respect the reader’s time.
Pro Tips
To enhance your automatic replies, integrate with Microsoft To Do for task reminders during absence. Use Viva Insights for wellness reminders before setting OOF.
For frequent travelers, create predefined templates for quick activation. Combine with email forwarding for critical messages.
Troubleshoot by checking the sent items folder for OOF replies, though they might not appear there. Use diagnostic tools in Outlook for connectivity issues.
Expert insight: Schedule replies to start slightly before your departure to cover early messages. Always inform your team manually in addition to automatic setups.
Another tip: Use emojis sparingly in professional messages to convey tone without overdoing it. For example, a calendar icon for return date.
If managing multiple accounts, use a unified inbox view to monitor setups. Regularly review and update contact lists for external replies.
For security, avoid mentioning vacation details that could indicate an empty home. Focus on work-related info.
Lastly, analyze reply effectiveness by noting response volumes upon return to refine future messages.
Frequently Asked Questions
Why aren’t my automatic replies sending? This could be due to account type limitations or offline status. Verify your connection and account settings.
Can I set different messages for specific people? Use rules combined with automatic replies for more targeted responses.
How do I turn off automatic replies? Revisit the settings and select the off option, or wait for the scheduled end.
Does this work with Gmail in Outlook? For IMAP, use rules to create templates instead of native automatic replies.
Will replies be sent to every email? Yes, unless filtered by rules or external options.
What if I forget to turn it off? Set a time range to automate deactivation.
Can I include attachments in replies? No, automatic replies are text-based only.
How does this affect my calendar? You can opt to block time and decline invites automatically.
Conclusion
Mastering automatic out of office replies in Outlook ensures smooth communication during absences, reducing stress and maintaining productivity. By following the step-by-step instructions for various platforms, customizing messages, and applying best practices, you can create effective setups tailored to your needs. Incorporating pro tips and addressing common questions further enhances your experience, allowing you to focus on your time away knowing your emails are handled professionally.
Full-stack developer at Scylla Technologies (USA), working remotely from Bangladesh. Adobe Certified Magento Developer.

