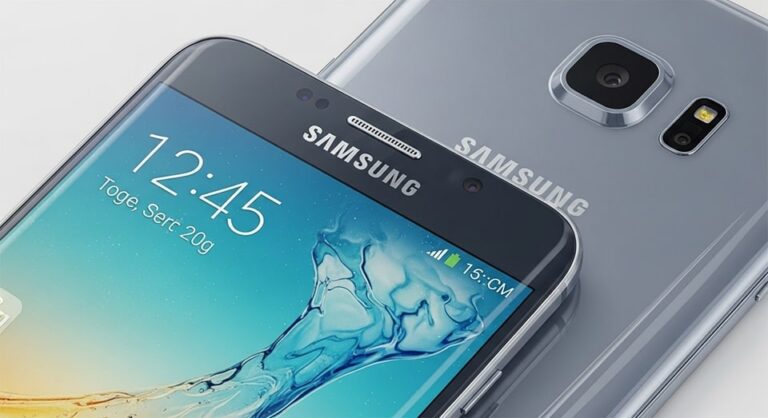
Hey there, Samsung Galaxy user! Whether you’re snapping a hilarious group chat moment, saving a recipe from a webpage, or documenting a high score in your favorite game, taking screenshots is one of those everyday tech skills that can make your life a whole lot smoother. With the latest Galaxy devices running One UI 7 as of late 2025, Samsung has kept things intuitive and versatile, offering a bunch of ways to capture your screen without fumbling around. In this guide, we’ll walk through every method step by step, from the classic button press to hands-free voice commands, so you can pick what fits your style—whether you’re on a flagship like the Galaxy S25 Ultra or a budget-friendly A-series phone.
What I love about Galaxy screenshots is how they’re not just a quick snap; they integrate seamlessly with editing tools and sharing options right out of the gate. No more switching apps or digging through menus. And with features like Scroll Capture, you can grab an entire conversation thread or article in one go, which is a game-changer for productivity. Let’s dive in and get you screenshot-savvy in no time.
Before we jump into the how-tos, a quick note: These methods work across most Galaxy phones and tablets, but availability can vary slightly based on your model, software version, and carrier. If something doesn’t click, we’ll cover troubleshooting later. Ready? Let’s start with the simplest way most folks use.
The Classic Button Combo: Quick and Reliable
Ah, the button method—it’s the go-to for a reason. This one’s been around since the early Galaxy days and hasn’t changed much because it just works. Perfect for when your hands are free and you need speed. On your Galaxy S25 or any recent model, it’s as straightforward as pressing two buttons at once.
Here’s how to do it: Locate the Power (or Side) button on the right edge of your phone—that’s the one that also turns your device on and off. Next to it, or on the left side depending on your model, is the Volume Down rocker. Press and hold both the Power button and the lower part of the Volume rocker simultaneously for about a half-second, then release. You’ll see the screen flash white (or hear a subtle camera shutter sound if you have it enabled), and a small preview thumbnail pops up in the bottom-left corner. Boom—screenshot captured!
That thumbnail isn’t just for show; it’s your gateway to instant edits or shares. Tap it to crop out the status bar, draw arrows for emphasis, or jot a quick note. If you ignore it, the full image saves automatically to your Gallery app under the Screenshots album. Pro tip: On foldables like the Galaxy Z Fold7, this works the same way whether the screen is unfolded or in Flex mode.
Why stick with buttons? They’re universal—no settings to tweak, and they work even if your phone’s in a case that blocks gestures. But if your fingers are occupied, say while cooking or driving (safely, of course), we’ve got alternatives coming up.
Gesture Magic: Palm Swipe for Effortless Captures
If you’re all about that futuristic vibe, Samsung’s palm swipe gesture turns your hand into a capture tool. Imagine swiping the side of your palm across the screen like you’re karate-chopping through bureaucracy—effortless and cool. This feature shines on larger screens like the S25 Plus or Tab S10, where reaching buttons can feel awkward.
First things first, you need to enable it, because it’s not on by default (Samsung’s way of saving battery, I suppose). Swipe down from the top of your screen with two fingers to pull down the Quick Settings panel. Tap the gear icon to head into Settings, then scroll to Advanced features. Under Motions and gestures, find Palm swipe to capture and toggle it on. A quick demo video might pop up—give it a watch to nail the motion.
Once activated, open whatever you want to capture, like a map in Google Maps or a Spotify playlist. Hold your hand parallel to the screen, pinky edge down, and swipe horizontally from left to right or right to left across the display. The screen flashes, and that handy thumbnail appears again. It’s surprisingly accurate after a couple tries, and you can even use it one-handed on portrait mode.
One caveat: It might take practice to avoid accidental swipes, especially if you’re a fidgety typer. And on some A-series budget models, it could be less responsive due to screen tech differences. But once you get it, you’ll wonder how you lived without it. For accessibility fans, this is gold—no button mashing required.
Hands-Free with Voice Commands: Bixby and Google to the Rescue
Not touching your phone at all? Voice commands are your best friend, especially in 2025 when assistants are smarter than ever. Samsung’s Bixby and Google’s Assistant both handle screenshots like pros, and with One UI 7’s refined voice processing, they’re quicker on the uptake even in noisy environments.
Start by ensuring your assistant is set up. For Bixby, swipe left from your home screen to open the app, or say “Hey Bixby” if voice wake-up is enabled in Bixby settings (found under Apps > Bixby Voice). Once listening, clearly say, “Take a screenshot.” The screen captures instantly, and Bixby can even chain it with actions like “Take a screenshot and share to Messages” or “Take a screenshot and set as wallpaper.” It’s like having a personal photographer on speed dial.
Google Assistant works similarly: Say “Hey Google, take a screenshot,” and it grabs the current screen. On Galaxy devices, it integrates deeply with One UI, so the post-capture toolbar pops up just like manual methods. This is particularly useful for tablets during video calls or when your hands are full with a baby or groceries—safety first!
To tweak voice sensitivity, head to Settings > Apps > Choose default apps > Digital assistant app, and fine-tune there. Note that in secure apps like banking, voice might be restricted for privacy. But for everyday use, it’s a seamless way to stay hands-free and productive.
S Pen Precision: For Note and Ultra Fans
If you’re rocking a Galaxy Note, S Ultra, or Z Fold with S Pen support, this stylus isn’t just for doodling—it’s a screenshot superpower. The Air command menu turns capturing into an artistic process, letting you annotate on the fly. With One UI 7, the S Pen feels even more responsive, thanks to lower latency updates.
To get started, simply remove the S Pen from its slot on your device. A floating Air command circle appears—tap it, then select Screen write. Your current screen gets captured automatically, opening in a full-screen editor where you can scribble notes, highlight text, or even add emojis with the S Pen tip. It’s pressure-sensitive, so thicker lines for emphasis or fine details for labels.
After editing, hit Save to stash it in Gallery, or Share directly to email a marked-up map to a friend. This method excels for professionals jotting feedback on designs or students diagramming equations. On the Tab S10, it pairs perfectly with DeX mode for desktop-like workflows.
Keep your S Pen charged via the phone’s coil, and if it’s not responding, a quick reseat usually fixes it. This isn’t available on non-S Pen models, but if you’re in that club, the other methods cover you just fine.
Edge Panels and Quick Shortcuts: Customize Your Flow
Samsung’s Edge panels are like a Swiss Army knife for your screen’s edge, and adding a screenshot shortcut makes capturing a swipe away. Ideal for multitaskers juggling apps on the big S25 Ultra display.
To set it up: Swipe inward from the right edge (or left, if customized) to open the Edge panel handle. Tap the settings gear at the bottom, select Tasks panel, then Edit. On the left, find Take screenshot and drag it to your active shortcuts on the right—up to 12 slots. Save, and now a simple swipe reveals the button.
Navigate to your target screen, swipe to the Tasks panel, and tap Take screenshot. The familiar flash and toolbar appear. This is great for gamers pausing mid-action or readers bookmarking long forms without leaving the page.
Customize further by rearranging shortcuts or changing the handle’s color in Edge screen settings. On foldables, it adapts to cover or main screens seamlessly.
Going Long: Scroll Capture for Full-Page Goodness
Ever tried screenshotting a recipe only to miss half the ingredients? Enter Scroll Capture, Samsung’s wizard for stitching long content into one epic image. Updated in One UI 7 for smoother auto-scrolling, it’s a must for web surfers and social scrollers.
First, take a standard screenshot using any prior method. Immediately, spot the Scroll Capture icon (two downward arrows) in the toolbar at the bottom. Tap it, and your Galaxy intelligently scrolls down, capturing section by section until you tap Stop or it hits the end. For tricky pages with embeds, long-press the icon to manual advance.
The result? A single, scaled PNG or JPG (your choice in settings) saved to Gallery. Edit it like any screenshot—crop the footer, highlight steps. This works best in browsers, Messages threads, or PDFs, but some apps block it for security.
On the A55 or newer, it handles dynamic content like infinite feeds better, reducing glitches. If the page is too wide, pinch to zoom first for optimal capture.
Editing, Annotating, and Organizing Your Captures
Capturing is half the fun; polishing makes it shine. Right after any screenshot, that bottom toolbar is your creative hub. Tap the pencil for Draw mode—choose colors, pens, or erasers to annotate. Crop handles let you trim edges, and text tools add labels without extra apps.
For deeper edits, open in Gallery: Select the image, tap the edit icon (scissors), and explore filters, adjustments, or even AI-powered object removal in One UI 7. Share via the three-dot menu to WhatsApp, email, or cloud storage. Bulk actions? Long-press multiples in the Screenshots album for group shares or deletes.
Organization tip: Use tags in Gallery search or create custom albums. On tablets, split-screen with Photos app for side-by-side editing. And remember, screenshots eat storage—regularly review and offload to Google Photos for backups.
Voice your edits too: “Hey Bixby, edit last screenshot” opens it directly. This workflow keeps things fluid, turning raw captures into polished assets.
Troubleshooting Common Screenshot Hiccups
Even on a slick Galaxy, things can glitch—maybe buttons won’t register, or palm swipe ghosts you. Don’t sweat it; most issues have quick fixes. We’ll break down the big ones here, so you can get back to snapping without frustration.
For starters, if the button combo fails, check for case interference—thick ones muffle presses. Remove it temporarily to test, and consider slimmer protection. Software glitches in One UI 7 betas caused freezes, but official updates patch them; ensure you’re on the latest via Settings > Software update.
Palm swipe not triggering? Double-check it’s enabled in Advanced features, and practice in a blank screen area. Restarting clears temporary sensor hiccups. Voice commands silent? Verify “Hey Bixby” wake word in settings, and speak clearly—accents or background noise can trip it up.
Here are some detailed troubleshooting steps for the most reported issues:
- Buttons Not Responding: This often stems from hardware sensitivity or debris under keys. Clean the edges with a soft cloth and compressed air, then test in Safe Mode (hold Power during reboot, select Safe Mode) to rule out app conflicts. If persistent, a factory reset via Recovery Mode (Volume Up + Power) can refresh, but back up first—it’s a last resort that wipes data.
- Palm Swipe Inaccurate or Missing: In One UI 7, some users noted it vanishing post-update; toggle it off/on in Motions and gestures, or clear Gesture service cache in Settings > Apps > Show system > Gesture service. Calibrate by following the on-screen demo slowly, ensuring your palm edge is flat—curved hands confuse the sensors.
- Scroll Capture Stops Early: Dynamic pages like social feeds resist auto-scroll; manual long-press the icon to advance frames. Update your browser or app, as older versions block extension. If the full image warps, switch to JPG format in Screenshots settings for better compression without quality loss.
- S Pen Screen Write Fails: Low battery in the stylus? Pop it in the slot to charge for 10 minutes. Re-pair via Air actions settings if unresponsive. On Ultras, magnetic attachments can loosen—ensure a snug fit, and avoid third-party pens that lack full One UI compatibility.
- No Toolbar After Capture: Enable it explicitly in Settings > Advanced features > Screenshots and screen recorder > Show toolbar after capturing. Carrier bloatware sometimes interferes; uninstall updates for system apps if safe. A quick reboot restores it 90% of the time.
- Screenshots Blocked in Apps: Secure apps like vaults or payments intentionally prevent captures for privacy— no workaround there. For others, check app permissions in Settings > Apps > [App] > Permissions. If it’s a game, enable Game Launcher for overlay allowances.
- Storage Full Errors: Screenshots pile up fast; monitor via Settings > Device care > Storage. Auto-delete old ones after 30 days in Gallery settings, or offload to external SD cards on supported models like the A35. Compress batches before sharing to save space.
- Voice Command Rejections: Muffled audio? Speak louder or closer to the mic. Retrain your voice model in Bixby/Google settings for better recognition. In low-power mode, assistants throttle—disable temporarily for critical captures.
These fixes cover 95% of snags based on community reports. If all else fails, Samsung’s support app has diagnostics—run a hardware test for buttons and sensors.
Pro Tips and Advanced Tricks for Screenshot Pros
Now that you’ve got the basics down, let’s level up. Did you know you can remap buttons for screenshots via Bixby Routines? Set a triple-tap on Power to capture, freeing up combos for other uses. Or integrate with Smart Select in Edge panels for irregular shapes—like circling a product in a photo.
For creators, combine Scroll Capture with GIF recorder for animated demos. In One UI 7, AI suggestions in the editor auto-crop faces or text blocks intelligently. And for privacy hawks, blur sensitive info with the eraser tool before sharing.
Batch rename in Gallery: Select multiples, tap Details > Rename for bulk labeling like “Recipes_2025.” On tablets, use Multi Window to screenshot one app while referencing another. Export to PDF via Print menu for professional reports.
Accessibility add-ons: Magnify the toolbar in Vision settings, or use TalkBack for voice-guided editing. Power users, script custom actions with Good Lock modules from Galaxy Store—endless tweaks await.
Conclusion
From button presses that never fail to palm swipes that wow, your Samsung Galaxy packs a screenshot toolkit that’s as versatile as it is user-friendly. We’ve covered the essentials—quick captures, gesture flair, voice ease, stylus smarts, edge shortcuts, and those lifesaving scrolls—plus edits, shares, and fixes to keep you rolling. Whether troubleshooting a glitch or propping up your workflow, these steps empower you to grab exactly what you need, when you need it. Dive in, experiment, and make your Galaxy work harder for you—happy snapping!
Full-stack developer at Scylla Technologies (USA), working remotely from Bangladesh. Adobe Certified Magento Developer.