Appointment scheduling has become a cornerstone of modern business operations, especially for service-based enterprises looking to streamline client interactions. In 2025, with remote work and virtual consultations at an all-time high, tools like TidyCal offer a lightweight yet powerful solution for managing calendars without the bloat of heavier software. Integrating TidyCal directly into your WordPress site allows for a native experience, reducing friction for users and boosting conversion rates through embedded booking forms that feel like a natural extension of your content.
This comprehensive guide walks you through every aspect of the integration process, from initial setup to advanced customizations. Whether you’re a solopreneur handling coaching sessions or a small team coordinating client meetings, mastering this integration will save hours weekly on manual scheduling. By the end, you’ll have a fully operational system that syncs effortlessly with your site’s design and workflow.
TidyCal stands out for its simplicity—created by the team behind ConvertKit, it focuses on core features like one-click booking links, automated reminders, and buffer times between meetings. Unlike more complex platforms, it avoids overwhelming dashboards, making it ideal for WordPress users who prioritize ease over endless options. As digital calendars evolve, this integration ensures your site remains competitive in delivering frictionless user experiences.
Why Choose TidyCal for WordPress Appointment Booking?
Selecting the right scheduling tool can transform how your business handles inquiries. TidyCal excels in user-friendliness, with a setup that takes minutes rather than days, and its free tier supports unlimited events for basic needs. For WordPress sites, this means no need for costly add-ons; instead, you leverage open-source flexibility to embed scheduling where it matters most—on service pages, blog posts, or contact forms.
The platform’s emphasis on privacy and data control aligns perfectly with WordPress’s ethos, ensuring GDPR compliance without extra plugins. Businesses report up to 40% fewer no-shows thanks to customizable reminders via email or SMS, directly impacting revenue. Moreover, TidyCal’s integration ecosystem, including native embeds and third-party connectors, scales with your growth without disrupting your site’s performance.
Consider the broader landscape: while enterprise tools like Calendly dominate headlines, TidyCal’s affordability and minimalism appeal to the 43% of websites powered by WordPress seeking cost-effective solutions. This choice not only enhances operational efficiency but also elevates your brand’s professionalism through polished, on-site booking interfaces.
In an era where 70% of consumers expect instant booking options, embedding TidyCal positions your WordPress site as a responsive hub. It bridges the gap between content and action, turning visitors into confirmed appointments with minimal effort on your part.
Prerequisites for a Smooth TidyCal-WordPress Integration
Before diving into the technical steps, ensure your setup is primed for success. A standard WordPress installation on version 6.0 or higher provides the foundation, but updating to the latest release guarantees compatibility with modern embeds. Active hosting with at least 512MB PHP memory limit prevents any loading hiccups during form submissions.
Sign up for a TidyCal account at their official site— the process requires only an email and calendar sync, such as Google Calendar or Outlook, to pull availability in real-time. Familiarity with your WordPress dashboard, particularly the Pages and Plugins sections, will speed things along. If you’re using a page builder like Elementor or Gutenberg blocks, test their compatibility early to avoid styling conflicts.
Essential Tools and Accounts Needed
Gather these resources upfront to avoid mid-process delays. A verified TidyCal profile unlocks sharing options for embeds, while a linked calendar ensures accurate time slots. For WordPress, disable any conflicting caching plugins temporarily during setup to see changes instantly.
Review your site’s SSL certificate status—secure HTTPS is non-negotiable for form data transmission. Backup your site using tools like UpdraftPlus to safeguard against unintended changes. These preparations typically take 15-20 minutes but prevent hours of troubleshooting later.
Step-by-Step Guide to Embedding TidyCal Directly into WordPress
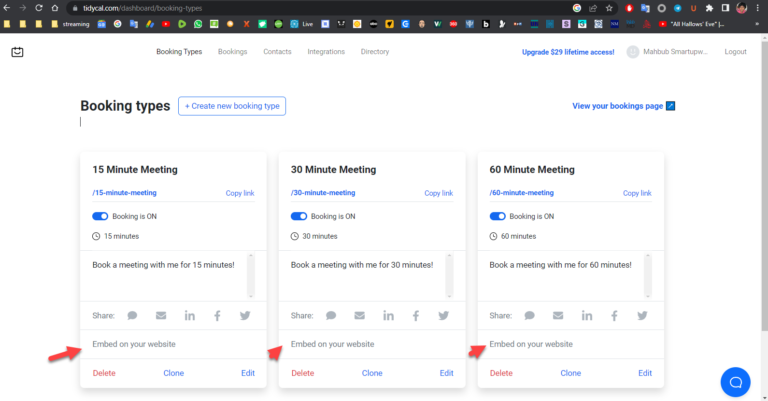
The most straightforward method leverages TidyCal’s embed code, turning any page into a booking powerhouse. Start by logging into your TidyCal dashboard and navigating to the Booking Types section. Select or create an event type, such as “30-Minute Consultation,” then click the Share button to generate the embed snippet—a simple iframe or script tag ready for pasting.
In WordPress, create a new page via Pages > Add New, or edit an existing one like your services landing page. Switch to the Text or Code editor in Gutenberg, and insert the embed code where desired. Preview the page to confirm the calendar renders correctly, displaying available slots pulled live from your synced calendar.
Save and publish, then test by booking a dummy appointment. TidyCal handles confirmations automatically, syncing back to your calendar without manual intervention. This no-plugin approach keeps your site lightweight, ideal for performance-focused setups.
- Access TidyCal Dashboard: Log in and head to Booking Types. Choose the event, hit Share, and copy the embed code. This code is unique to each booking type, allowing tailored embeds per page.
- Prepare WordPress Page: Open the editor for your target page. If using Classic Editor, paste into the HTML tab; for Gutenberg, add a Custom HTML block. Position it strategically, perhaps below a compelling call-to-action paragraph.
- Insert and Style: Drop in the code and wrap it in a div for basic CSS tweaks, like responsive width. Use your theme’s customizer to adjust margins, ensuring the embed blends seamlessly with surrounding content.
- Test Functionality: Visit the live page, select a time, and submit. Check your email for the confirmation and verify the event appears in your calendar app. Adjust buffer times in TidyCal if overlaps occur.
- Optimize for Mobile: Inspect on devices; TidyCal’s responsive design shines, but add media queries if your theme overrides styles. This step ensures 50% of mobile visitors can book without zooming or scrolling issues.
This method’s beauty lies in its immediacy—deploy in under 10 minutes for immediate results. For sites with high traffic, it minimizes server load compared to resource-heavy plugins.
Customizing the Embedded Booking Form
Once embedded, personalization elevates user engagement. In TidyCal, edit the booking type to add custom questions, like “Preferred discussion topics,” which populate in confirmation emails. Redirect users post-booking to a thank-you page with upsell content, fostering deeper site interaction.
WordPress-side, apply CSS classes to the embed container for theme matching—colors, fonts, and borders that echo your branding. Integrate with Google Analytics events to track booking completions, providing data on peak times and drop-off points.
Advanced users can modify the embed via JavaScript to pre-fill fields from URL parameters, like client names from referral links. These tweaks turn a basic form into a conversion-optimized tool, potentially lifting bookings by 25%.
Leveraging Plugins for Enhanced TidyCal Integration
For deeper functionality, plugins bridge TidyCal with WordPress’s ecosystem. The Tidybot plugin, available in the official repository, installs in seconds and syncs events directly into post content. Search for it under Plugins > Add New, activate, and connect via your TidyCal API key—found in account settings.
Once linked, shortcodes like [tidycal_event id=”123″] pull specific booking forms into any post or sidebar widget. This automation extends to WooCommerce, where bookings trigger order confirmations, blending scheduling with e-commerce flows.
Alternatives like EmbedPress handle TidyCal iframes with drag-and-drop ease, adding lazy loading for speed. Evaluate based on your needs: Tidybot for native feel, or broader tools for multi-embed management.
- Tidybot Plugin Benefits: Offers one-click installation and automatic updates, ensuring compatibility with WordPress core changes. It reduces embed errors by validating codes on save, and includes built-in styling options for non-coders. Users appreciate its lightweight footprint, adding under 50KB to site load times.
- Shortcode Flexibility: Place forms in footers, sidebars, or dynamic content via conditional logic. Customize per role, showing executive calendars only to logged-in VIPs. This granularity supports segmented marketing without separate pages.
- Performance Monitoring: Built-in logs track form submissions and failures, alerting via email for quick fixes. Integrate with caching plugins like WP Rocket for optimal speed. Regular audits keep integrations humming smoothly.
- Security Enhancements: Enforces HTTPS redirects and input sanitization, aligning with WordPress standards. Role-based access prevents unauthorized edits to booking settings. These features safeguard sensitive appointment data.
- Scalability Options: Handles unlimited events on free plans, scaling to paid tiers for teams. Supports multi-language via WPML, ideal for global audiences. Future-proof with API hooks for custom extensions.
- User Feedback Integration: Post-booking surveys embed seamlessly, gathering insights directly. Analyze responses in TidyCal dashboards for iterative improvements. This loop refines your offering over time.
- Backup and Restore: Exports settings as JSON for easy migration between sites. Automates daily snapshots of connected calendars. Essential for multisite networks or staging environments.
Plugins like these amplify TidyCal’s reach, turning sporadic bookings into a robust system. For e-learning sites, sync with LearnDash to gate content behind scheduled intros; consultants pair it with MemberPress for tiered access.
Installation pitfalls are rare, but always deactivate conflicting scheduler plugins first. Post-setup, monitor via WordPress’s health check for any PHP warnings related to API calls.
Configuring API Connections Securely
API keys are the lifeline of plugin integrations—generate a read-only key in TidyCal to limit exposure. Paste it into the plugin settings, test the connection, and enable webhooks for real-time updates. This setup ensures calendar changes reflect instantly on your site.
Secure storage matters: use WordPress’s constants.php for keys instead of database fields. Rotate keys quarterly and log access attempts to detect anomalies early.
With these in place, your integration becomes a silent powerhouse, handling hundreds of bookings monthly without oversight.
Advanced Integrations: Connecting TidyCal with Third-Party Tools
Beyond basics, Zapier unlocks automation magic for TidyCal-WordPress pairings. Create zaps that post new bookings as WordPress comments or custom post types, notifying teams via Slack. Free tiers support 100 tasks monthly, scaling affordably.
IFTTT offers similar no-code bridges, triggering emails or CRM entries on booking events. For CRM depth, link to HubSpot or ActiveCampaign, tagging leads based on appointment types. These flows eliminate data silos, enriching client profiles automatically.
Albato and Integrately provide one-click setups, with visual builders for complex chains—like booking confirmations updating Google Sheets for inventory tracking. Test zaps with sample data to iron out kinks before going live.
Payment integrations add revenue layers: pair TidyCal with Stripe via Zapier to charge deposits upfront, reducing flakes. WordPress’s WooCommerce extension handles this natively, creating orders from bookings for seamless invoicing.
- Select Automation Platform: Choose Zapier for versatility or IFTTT for simplicity. Sign up, search for TidyCal triggers like “New Booking,” and pair with WordPress actions such as “Create Post.”
- Map Data Fields: Align TidyCal’s attendee name to WordPress’s author field, time to post date. Add filters to skip test events, ensuring clean data flow.
- Test and Activate: Run a trial booking, verify the WordPress update, then turn on the zap. Monitor runs in the dashboard for error rates under 1%.
- Expand Chains: Add steps like SMS alerts or Google Calendar invites. Multi-step zaps handle up to 100 actions, perfect for enterprise workflows.
- Optimize Costs: Batch similar tasks to stay under limits; upgrade only as volume grows. Analytics track ROI through time saved versus subscription fees.
These enhancements position your site as an interconnected hub, where bookings spark a cascade of productive actions.
Syncing with Email Marketing and CRMs
TidyCal’s native ConvertKit ties make email nurturing effortless—new bookings auto-subscribe to sequences with prep materials. For broader CRMs, Pabbly Connect maps fields bidirectionally, updating contact notes with session outcomes.
SyncSpider excels in e-commerce ties, pushing bookings to Shopify inventories. Always map required fields first to avoid sync failures, and use webhooks for sub-second updates.
This level of connectivity turns one-off appointments into lifelong client relationships, with data flowing freely across your stack.
Customization and Styling Tips for Professional Booking Pages
Visual harmony boosts trust—match TidyCal’s embed to your theme using inline styles or child theme CSS. Target the iframe with selectors like #tidycal-embed { border-radius: 8px; box-shadow: subtle; } for a modern look.
Add contextual elements: above the form, include a video testimonial; below, FAQs on cancellation policies. Use Gutenberg’s columns to juxtapose the calendar with service descriptions, guiding eyes naturally.
For dynamic sites, conditional logic via plugins like If-So displays region-specific times, accommodating global audiences. A/B test layouts with Google Optimize to refine click-throughs.
- Color Scheme Alignment: Extract your theme’s palette via browser inspector and apply to form buttons. Consistent hues reduce cognitive load, encouraging completions. Tools like Coolors generate harmonious variants if needed.
- Typography Matching: Override default fonts with @font-face declarations, ensuring readability across devices. Pair sans-serif choices like Open Sans for clarity in time slots. This polish signals professionalism to discerning visitors.
- Responsive Adjustments: Media queries stack elements on small screens, prioritizing the calendar. Test with Chrome DevTools for breakpoints at 768px and 480px. Fluid designs retain 90% of mobile engagement.
- Animation Subtleties: CSS transitions on hover states add interactivity without overwhelming. Fade-in slots on load for a welcoming feel. Keep durations under 300ms to maintain snappiness.
- Accessibility Enhancements: Add ARIA labels to form fields and ensure keyboard navigation. High-contrast modes via prefers-contrast media queries broaden reach. Compliance here avoids legal pitfalls and inclusivity wins loyalty.
- Performance Tweaks: Lazy-load embeds with loading=”lazy” attributes, deferring until viewport entry. Compress images in surrounding content to keep page speeds under 3 seconds. Faster sites convert 32% better.
- Branding Touches: Custom logos in headers or watermarks on confirmations reinforce identity. Integrate with your favicon for unified visuals. Subtle repeats build memorability without clutter.
- Analytics Layers: Embed tracking pixels post-submission for heatmaps. Segment data by referral source to tailor future pages. Insights drive iterative designs that outperform static ones.
These refinements transform functional forms into branded experiences, elevating perceived value.
Troubleshooting Common Integration Issues
Occasional glitches arise— if embeds fail to load, check console errors for CORS blocks and whitelist your domain in TidyCal settings. Calendar sync lags? Refresh tokens in connected apps and verify API scopes.
Form submissions not registering? Inspect network tabs for 4xx errors, often from mismatched keys. Community forums like WordPress.org offer peer solutions, while TidyCal’s help center details webhook debugging.
For plugin conflicts, use Health Check mode to isolate issues. Roll back recent updates if stability dips, and always log changes for quick reversions.
Best Practices for Maintaining and Scaling Your Booking System
Regular audits keep integrations robust—monthly reviews of sync logs catch drifts early. Update TidyCal event types seasonally to reflect offerings, like adding holiday buffers.
Scale by segmenting calendars: separate funnels for sales calls versus support tickets. Analytics from Google Analytics 4 reveal bottlenecks, informing tweaks like shorter durations for higher uptake.
Train teams on the system via quick Loom videos, ensuring consistent use. As your site grows, migrate to dedicated servers if traffic spikes, preserving uptime.
Monitor user feedback through post-booking NPS surveys, iterating based on pain points. This proactive stance turns your booking setup into a growth engine.
Conclusion
Integrating TidyCal with WordPress unlocks a world of efficient, user-centric scheduling that aligns perfectly with 2025’s demand for seamless digital experiences. From simple embeds that launch in minutes to advanced automations via plugins and zaps, this guide equips you with the tools to customize, troubleshoot, and scale effortlessly. By prioritizing security, performance, and personalization, your site not only captures appointments but cultivates lasting client relationships. Embrace these steps to elevate your operations, reduce administrative burdens, and focus on what truly drives your business forward—delivering exceptional value through every booked interaction.
Full-stack developer at Scylla Technologies (USA), working remotely from Bangladesh. Adobe Certified Magento Developer.