The flashlight feature on your iPhone provides a convenient source of light using the device’s LED flash. This tool has become essential for many users in low-light situations, whether navigating dark rooms or finding lost items under furniture. Understanding the various ways to control this feature ensures you can manage it efficiently without unnecessary battery drain.
Over the years, Apple has integrated the flashlight into the iOS ecosystem, making it accessible through multiple interfaces. From the earliest iPhone models with basic controls to the latest versions with advanced gestures, the evolution reflects a focus on user convenience. Knowing these methods allows you to adapt to different scenarios, such as when your hands are full or the screen is locked.
Many users encounter situations where the flashlight activates accidentally, often due to pocket dials or unintended touches on the lock screen. This can lead to frustration and quicker battery depletion. By mastering the shutdown techniques, you prevent such issues and maintain better control over your device’s functions.
Exploring these approaches reveals how Apple prioritizes intuitive design. Each method builds on the iPhone’s hardware and software synergy, offering redundancy for reliability. Whether you’re a new user or a seasoned one, these insights enhance your overall experience with the device.
Understanding the Flashlight Feature
The flashlight utilizes the rear camera’s LED flash, originally designed for photography, as a continuous light source. This dual-purpose design maximizes hardware efficiency without adding extra components. Users appreciate this integration because it keeps the iPhone sleek while providing practical utility.
Activation typically occurs through quick access points, ensuring you can illuminate areas instantly. The brightness levels are adjustable on most models, allowing customization based on need. For instance, dimmer settings conserve energy during prolonged use.
Apple has refined this feature across iOS updates, adding options like haptic feedback for confirmation. These enhancements make interactions more tactile and reassuring. Familiarity with these nuances helps in troubleshooting when something feels off.
Safety considerations include avoiding direct eye exposure to the bright light, which could cause temporary discomfort. Additionally, prolonged use in hot environments might affect device performance. Keeping these in mind promotes responsible usage.
History and Evolution
Introduced in iOS 7, the flashlight became a staple in the Control Center, marking a shift toward quick toggles. Early versions offered simple on-off functionality without brightness controls. This basic setup laid the foundation for future improvements.
With iOS 10, 3D Touch enabled variable intensity, revolutionizing how users interacted with the light. This pressure-sensitive feature allowed for nuanced control directly from the icon. It demonstrated Apple’s commitment to leveraging touch technology.
Subsequent updates incorporated Siri integration, enabling voice commands for hands-free operation. This was particularly beneficial for accessibility users. The progression shows a pattern of increasing inclusivity and convenience.
In recent models like the iPhone 15 and beyond, the Action button provides a physical shortcut. This hardware addition complements software methods, offering more options. The ongoing development ensures the feature remains relevant in modern usage.
Method 1: Using the Control Center
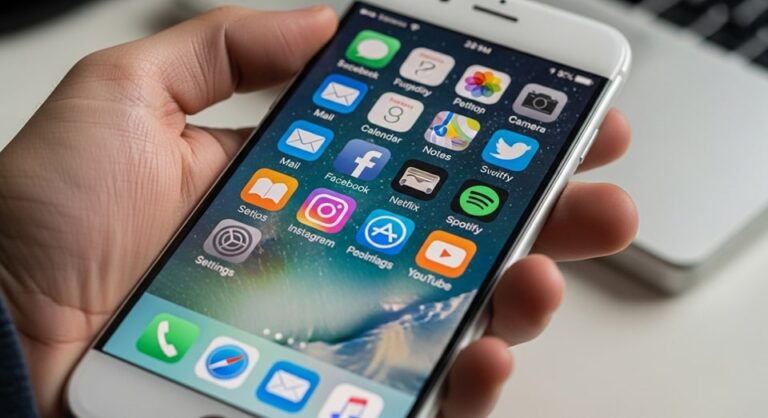
The Control Center serves as the primary hub for quick settings, including the flashlight. Accessing it involves a simple swipe gesture from the top-right corner on Face ID models or up from the bottom on Home button devices. This centralized location streamlines adjustments.
Once open, the flashlight icon appears prominently among other toggles. Tapping it activates or deactivates the light instantly. For models supporting it, long-pressing reveals a slider for brightness adjustment.
This method is ideal for when the phone is unlocked and you’re navigating apps. It provides a consistent experience across iOS versions. Users often prefer it for its reliability and speed.
Customizing the Control Center allows you to reposition the icon for easier access. Go to Settings, then Control Center, to add or rearrange controls. This personalization enhances usability for frequent users.
Step-by-Step Instructions
- Wake your iPhone by pressing the side button or tapping the screen. Ensure the device is unlocked if necessary for full access.
- Swipe down from the upper-right corner on models without a Home button. For older models, swipe up from the bottom edge instead.
- Locate the flashlight icon, which resembles a small torch. It will be illuminated if the light is on.
- Tap the icon once to turn off the light. A brief haptic feedback confirms the action on supported devices.
- If the icon isn’t visible, check your settings to ensure it’s included in the Control Center layout.
Following these steps ensures a seamless process. Practice a few times to make it second nature. This approach minimizes errors in dim environments.
Method 2: From the Lock Screen
The lock screen offers direct access to the flashlight without unlocking the device. This is convenient for immediate use but can lead to accidental activations. Knowing how to deactivate it here is crucial.
On the lock screen, the flashlight icon sits in the bottom-left corner on most recent models. Pressing and holding it toggles the state. This design prioritizes quick actions while maintaining security.
For added customization, you can remove or add this shortcut via wallpaper settings. This prevents unintended triggers, especially in pockets or bags. Adjusting these preferences tailors the experience to your habits.
This method shines in emergencies where speed is essential. It bypasses additional steps, saving precious seconds. Many users rely on it for its straightforwardness.
Detailed Guide
- Press the side button to wake the screen without unlocking. The lock screen appears with quick access icons.
- Find the flashlight icon in the lower-left area. It glows when active.
- Press and hold the icon until the light turns off. Release once confirmed.
- If the icon is missing, customize your lock screen through the settings app.
- Test the action in a safe environment to familiarize yourself with the touch sensitivity.
These instructions cater to users who prefer minimal interaction. They work across various iPhone models with minor variations. Consistency in practice builds confidence.
Method 3: Using Siri Voice Commands
Siri provides a hands-free option for controlling the flashlight, ideal for when your hands are occupied. This voice-activated assistant responds to natural language commands. Integration with the flashlight expands its utility.
To use this, ensure Siri is enabled in your settings. Speak clearly, especially in noisy environments, for accurate recognition. This method enhances accessibility for all users.
Commands can be simple or specific, allowing flexibility. For example, specifying brightness levels if desired. This verbal control aligns with Apple’s ecosystem of smart features.
Privacy considerations include ensuring Siri only activates on your command. Adjust settings to prevent accidental triggers. This balance maintains security while offering convenience.
Command Examples
- Say “Hey Siri, turn off the flashlight.” This direct command works reliably in most situations. It’s straightforward and requires no additional phrasing. Users find it efficient for quick deactivations.
- Try “Siri, switch off the torch.” Using synonyms like “torch” accommodates regional language differences. This flexibility ensures global usability. It demonstrates Siri’s adaptive language processing.
- Command “Hey Siri, disable the LED light.” Referring to it as LED light can be useful in technical contexts. This variation helps when standard terms don’t register. It adds robustness to voice interactions.
- Use “Siri, turn the flashlight off now.” Adding urgency words doesn’t change functionality but feels responsive. This phrasing suits fast-paced scenarios. It enhances the user experience through perceived immediacy.
- Say “Hey Siri, shut down the flashlight.” Alternative verbs like “shut down” provide options for expression. This diversity prevents monotony in commands. It caters to individual speaking styles.
- Attempt “Siri, off with the light.” Playful phrasing can work if recognized correctly. This adds fun to interactions. However, stick to clear commands for reliability.
- Command “Hey Siri, deactivate flashlight.” Technical terms like “deactivate” appeal to precise users. This option refines control. It integrates well with other Siri functions.
- Use “Siri, end flashlight mode.” Framing it as ending a mode can be intuitive. This perspective aids in conceptualizing the feature. It supports seamless transitions.
These examples illustrate the versatility of voice control. Experiment to find what works best for you. Regular use improves Siri’s recognition of your voice.
Method 4: Swipe Gesture for Camera Access
A clever trick involves partially swiping to open the camera, which automatically turns off the flashlight. This method exploits the camera’s priority over the LED. It’s a quick workaround without menus.
From the lock screen, swipe left slightly and release before fully opening the camera. The light extinguishes as the system prepares for photo mode. This gesture is subtle and efficient.
Users discovered this through trial and error, highlighting community-driven tips. It works on locked devices, adding to its appeal. No settings changes are required.
Practice the swipe distance to avoid launching the camera app unintentionally. This fine-tuning prevents disruptions. It’s particularly useful in dark settings where visibility is low.
Execution Steps
- Wake the lock screen by tapping or pressing the side button. Ensure the flashlight is on to test.
- Place your finger on the right side of the screen. Prepare for a leftward motion.
- Swipe gently to the left, about a quarter of the way. Release immediately.
- Observe the light turning off as the camera preview attempts to start. The screen returns to lock.
- Repeat if needed, adjusting swipe length for optimal results.
This technique offers a tactile alternative to button presses. It’s discreet and doesn’t require looking at the screen closely. Ideal for on-the-go situations.
Method 5: Action Button on Pro Models
For iPhone 15 Pro and later, the Action button provides a customizable physical control. Assign it to the flashlight for direct toggling. This hardware feature enhances one-handed operation.
Configure it in Settings under Action Button. Select the flashlight option from the list. A long press then controls the state.
This method is tactile, offering feedback through the button’s press. It’s beneficial in gloves or when touch screens are less responsive. Apple designed it for versatility.
Reassigning the button allows for other functions when not needed for light control. This flexibility adapts to changing needs. Regular users appreciate the customization.
Configuration Guide
- Open the Settings app on your iPhone. Scroll to the Action Button section.
- Tap to enter the configuration menu. Swipe through options until flashlight appears.
- Select flashlight as the action. Confirm the choice.
- Press and hold the Action button to test. The light should toggle.
- Adjust if necessary by repeating the process.
Setting this up takes moments but saves time long-term. It’s a premium feature that justifies Pro model upgrades. Enhances overall device interaction.
Method 6: Back Tap Gesture
Back Tap allows assigning actions to double or triple taps on the iPhone’s back. Set it to toggle the flashlight for innovative control. This accessibility feature uses sensors cleverly.
Enable it in Settings under Accessibility, then Touch, and Back Tap. Choose double or triple tap and assign flashlight. This hands-free method is unique.
It’s useful when the phone is face down or in a case. The gesture detection works through most materials. Users with mobility challenges benefit greatly.
Calibrate sensitivity to avoid false triggers. This ensures reliable performance. It’s a hidden gem in iOS capabilities.
Setup Instructions
- Navigate to Settings, Accessibility, Touch. Select Back Tap.
- Choose Double Tap or Triple Tap. Scroll to find flashlight toggle.
- Assign the action. Exit settings.
- Test by tapping the back accordingly. Adjust if detection is inconsistent.
- Use in various positions to master the gesture.
This innovative approach adds layers to iPhone usability. It’s discreet and modern. Expands control options beyond traditional inputs.
Troubleshooting Common Issues
Sometimes the flashlight refuses to turn off, indicating a potential glitch. Restarting the device often resolves this. Hold the side and volume buttons until the slider appears, then power off and on.
Software updates can fix persistent problems. Check for iOS updates in Settings under General. Installing the latest version addresses known bugs.
If hardware issues suspect, visit an Apple Store. They diagnose LED malfunctions. Warranty coverage might apply.
Battery health impacts performance. Low power mode might limit features. Charge the device fully to test.
- Check for conflicting apps that use the camera. Close background apps via the app switcher. This frees up resources and might resolve the issue. Some third-party apps interfere with system controls.
- Reset all settings if needed. Go to Settings, General, Transfer or Reset iPhone, Reset, Reset All Settings. This doesn’t erase data but reverts customizations. It’s a safe step before more drastic measures.
- Inspect for physical damage to the LED area. Dirt or cases might obstruct. Clean gently with a soft cloth. Protective cases sometimes cause sensor errors.
- Test in safe mode by restarting while holding volume down. This isolates software conflicts. If the issue persists, it’s likely hardware-related.
- Monitor for overheating, which can trigger safety shutdowns. Allow the device to cool. Avoid using in direct sunlight for extended periods.
- Review accessibility settings for unintended toggles. Features like AssistiveTouch might override. Disable temporarily to check.
- Update apps that integrate with flashlight. Outdated versions cause incompatibilities. App Store updates ensure harmony.
These troubleshooting steps cover most scenarios. Systematic approach identifies the root cause. Patience yields results.
Battery Impact and Optimization
The flashlight consumes battery, especially at full brightness. Limiting use extends life. Adjust to lower levels when possible.
Background processes exacerbate drain. Close unused apps regularly. This conserves energy overall.
Enable low power mode in Settings under Battery. It dims the screen and limits features. Useful during extended outings.
Monitor usage stats to identify patterns. Battery section shows consumption details. Adjust habits accordingly.
- Use auto-brightness for screen efficiency. It adapts to ambient light. This indirectly saves power by reducing manual adjustments.
- Avoid charging in hot conditions. Heat affects battery health. Optimal temperatures prolong lifespan.
- Calibrate battery periodically. Drain to zero then full charge. This maintains accuracy in percentage display.
- Opt for official chargers. Third-party ones might underperform. Consistency ensures safety.
- Disable unnecessary notifications. They wake the screen frequently. Curating alerts preserves charge.
- Utilize dark mode in apps. It reduces power on OLED screens. Aesthetic and functional benefit.
- Track wireless connections. Bluetooth and Wi-Fi drain when searching. Toggle off when not needed.
Optimizing these aspects maximizes iPhone longevity. Small changes yield significant savings. Informed usage empowers better management.
Accessibility Considerations
Apple emphasizes inclusivity with features aiding diverse needs. VoiceOver describes flashlight status audibly. This assists visually impaired users.
Switch Control allows navigation via external devices. Assign flashlight toggle to switches. Expands options for motor challenges.
AssistiveTouch creates virtual buttons. Place a flashlight control on screen. Customizable for ease.
Magnifier integrates with flashlight for close-up views. Useful for reading fine print. Combines tools effectively.
- Enable color filters for better visibility. Adjust for color blindness. Enhances icon recognition.
- Use haptic alerts for confirmation. Vibrations signal state changes. Tactile feedback is reassuring.
- Customize text size for settings menus. Larger fonts aid navigation. Improves overall accessibility.
- Integrate with hearing aids. Bluetooth connectivity streamlines. Ensures seamless operation.
- Leverage Shortcuts app for automation. Create flashlight routines. Simplifies complex actions.
- Explore Guided Access for focused use. Limits to specific features. Prevents accidental changes.
- Utilize Family Sharing for setup help. Shared knowledge assists. Builds supportive environments.
These features demonstrate Apple’s commitment to all users. Tailoring them personalizes the experience. Accessibility evolves with each iOS update.
Pro Tips
Beyond basic methods, advanced techniques enhance control. Integrate with Shortcuts for automated toggles based on time or location. This proactive approach anticipates needs.
Use widgets for quick status checks. Add a battery widget showing accessory usage. Monitors flashlight impact indirectly.
Combine with other features like Night Shift for eye comfort in dark. Reduces strain during use. Holistic optimization.
- Assign to Focus modes. Automatically disable in certain scenarios. Maintains discipline in usage.
- Test in different lighting. Understand brightness effectiveness. Adapts to environments.
- Share tips with others. Community knowledge spreads. Enhances collective experience.
- Backup settings regularly. iCloud preserves customizations. Easy restoration.
- Explore third-party apps for enhanced controls. Some offer timers. Adds functionality.
- Monitor for iOS betas. Early access to new features. Stay ahead.
- Practice in simulations. Darken room for realism. Builds proficiency.
- Incorporate into daily routines. Consistency reinforces habits. Effortless integration.
These pro tips elevate your mastery. They transform basic knowledge into expertise. Continuous learning unlocks potential.
Frequently Asked Questions
Why does my flashlight turn on by itself?
Accidental activations often occur from lock screen touches or back taps. Adjust settings to remove shortcuts if problematic. Cases might press buttons inadvertently.
What if the flashlight is stuck on?
Force restart the device by pressing volume up, down, then side button until Apple logo. This resolves software glitches. If persists, seek professional repair.
Can I adjust flashlight brightness?
Yes, long-press the icon in Control Center for a slider. Available on models with 3D Touch or Haptic Touch. Levels range from dim to full.
Does the flashlight work on all iPhone models?
Most models from iPhone 4 onward have it, but older ones lack LED flash. Check your model specifications. Updates ensure compatibility.
How does it affect battery life?
Moderate use has minimal impact, but full brightness drains faster. Monitor in Battery settings. Optimize by using sparingly.
Is there a timer for the flashlight?
Native iOS doesn’t have one, but Shortcuts app can create automated shutoffs. Third-party apps offer this. Explore App Store options.
Can I use it while recording video?
Yes, the camera app allows torch mode during video. It provides continuous light. Toggle in the app interface.
What if Siri doesn’t respond?
Ensure Siri is enabled and internet connected if needed. Restart the device. Check microphone for obstructions.
Conclusion
Mastering the various methods to control the flashlight on your iPhone empowers efficient usage across scenarios. From quick gestures to voice commands, these techniques cater to diverse needs and preferences. Troubleshooting and optimization further ensure reliability and longevity.
Incorporating pro tips and addressing common questions enhances your overall proficiency. Accessibility features make it inclusive, reflecting thoughtful design. Ultimately, these insights contribute to a seamless iPhone experience, minimizing frustrations and maximizing utility.
Full-stack developer at Scylla Technologies (USA), working remotely from Bangladesh. Adobe Certified Magento Developer.