How to Find Downloads on a Mac
The primary and most straightforward method for locating your downloads is through the Finder, the quintessential file management system on every Mac. You can quickly access the Downloads folder by clicking on the Finder icon in your Dock—it’s the smiling blue and white face—and then looking for the “Downloads” entry in the sidebar that appears on the left-hand side of any Finder window. If you don’t see it listed, you can enable it by opening Finder Preferences from the menu bar, selecting the “Sidebar” tab, and ensuring the checkbox next to “Downloads” is ticked. This provides a permanent and easily accessible shortcut. For those who prefer a more visual approach, you can also navigate to it directly by opening your user folder, which is typically named after you, where the Downloads folder resides alongside other default directories like Documents, Pictures, and Movies.
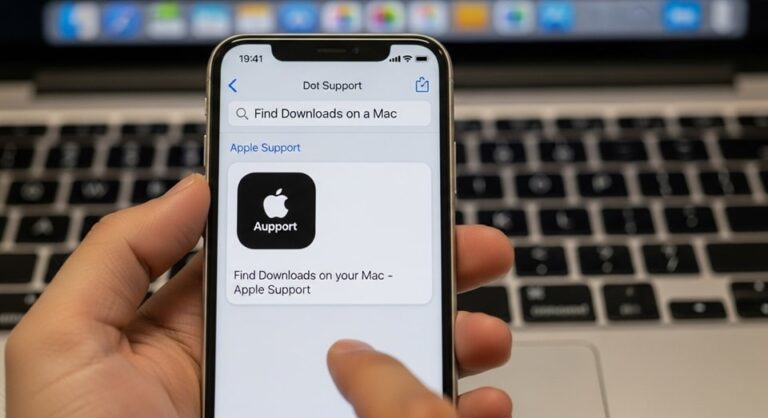
Beyond the Finder’s sidebar, your Mac offers several powerful and efficient tools to locate your downloaded files in an instant. Spotlight Search, a system-wide indexing tool, is arguably the fastest method. Simply press Command + Spacebar on your keyboard to bring up the search bar, type “Downloads,” and press Enter. This will immediately open the Downloads folder in a new Finder window. You can take this a step further by typing the name of a specific downloaded file directly into Spotlight. For hands-free operation, you can even ask Siri to “Open my Downloads folder,” and the digital assistant will comply, showcasing the integration of Apple’s ecosystem. These methods are invaluable when you need immediate access without navigating through menus, significantly speeding up your workflow.
For users who prefer keyboard shortcuts and command-line interfaces, the Terminal application provides a direct path to any folder, including Downloads. By opening Terminal from your Utilities folder and typing `open ~/Downloads/` followed by the Enter key, the Downloads folder will spring open on your desktop. This method, while less common for casual users, highlights the underlying Unix power of macOS and is a favorite among developers and power users. Furthermore, your web browser itself often provides a direct link to recent downloads; most browsers like Safari, Chrome, and Firefox display a download history or a small arrow icon that, when clicked, shows recent files and an option to “Show in Finder,” acting as a direct bridge from your browser to the file’s location on your disk.
Mastering the Default Download Location and Customization
While the default Downloads folder is convenient, you are not permanently bound to it. There are numerous practical reasons for changing where your browser saves files. Perhaps your primary drive is low on space, and you want to save large files directly to an external hard drive or a larger internal partition. Maybe you are working on a specific project and want all related downloads to automatically go into a dedicated project folder, thereby reducing clutter and streamlining organization from the very beginning. Changing this setting is a proactive step in digital hygiene, ensuring files are sorted upon arrival rather than requiring you to move them later, a task that is often forgotten and leads to a disorganized and bloated default folder.
The process for altering your download destination is performed within your web browser’s settings, and while the steps are similar, they vary slightly between applications. In Safari, you would open Preferences from the Safari menu, go to the “General” tab, and find the “File download location” option next to which you can choose “Other” to select a new folder. Google Chrome users need to click the three-dot menu icon, select “Settings,” then “Downloads,” and use the “Location” option to change the path. Firefox follows a nearly identical pattern under its Preferences > General > Files and Applications section. It is highly recommended to choose a new, empty folder specifically for this purpose rather than an existing folder full of other documents to avoid confusion and maintain order.
It is crucial to understand that changing the download location in one browser does not affect the others; each application manages its own settings independently. Therefore, if you use multiple browsers regularly, you will need to configure this preference in each one to maintain a consistent and unified download strategy across your entire system. For users who consistently work with large media files or datasets, directing downloads to a high-capacity external drive can be a game-changer for managing primary storage space. According to reports on data management, users who consciously organize their digital storage from the point of download report higher productivity and less time spent searching for files later. Establishing this habit is a small investment of time that pays significant dividends in long-term efficiency.
Advanced Organization: Taming the Chaos in Your Downloads Folder
Left unchecked, the Downloads folder can quickly become a digital junk drawer—a chaotic mix of files with no apparent order. Implementing a simple organization system can transform it from a source of stress into a model of efficiency. The first and most powerful rule is to adopt a “download and deal” mentality: never leave a file in the Downloads folder indefinitely. Instead, make it a habit to immediately move each downloaded file to a more appropriate, permanent home within your Documents, Pictures, or a specific project folder after it has served its immediate purpose. This prevents the folder from becoming a long-term storage solution, for which it is ill-suited.
For those who prefer automation, macOS offers powerful tools to help keep things tidy. You can use Smart Folders within Finder, which are virtual folders that automatically collect files based on criteria you set, such as file type, download date, or name. Even more effective are Folder Actions, which can be set up through AppleScript or Automator to automatically move files from your Downloads folder to other locations based on rules—for example, all `.jpg` files could be instantly transferred to a “Downloaded Images” folder. For a more structured approach, consider adopting a consistent naming convention for important files you download, including the date or project name, which makes them far easier to locate using Spotlight search weeks or months later.
Regular maintenance is the final key to a clean Downloads folder. Schedule a brief weekly or monthly review to purge unnecessary files. Sort the folder by date by clicking the “Date Added” column header in Finder; this will quickly surface old files that you likely no longer need, such as old installers, temporary documents, or forgotten PDFs. Dragging these files to the Trash will free up valuable disk space and reduce visual clutter. For many users, the Downloads folder is the most frequently accessed directory on their Mac, so keeping it organized has an outsized impact on their overall computing experience. By combining immediate action, smart automation, and regular clean-ups, you can ensure this folder remains a useful tool rather than a digital burden.
Troubleshooting and Pro Tips for Power Users
Even with a solid organizational system, sometimes files seem to vanish, or the default location behaves unexpectedly. The first step in troubleshooting is to verify the download location in your browser, as it may have been accidentally changed or reset after a software update. If you cannot find a file using any standard method, it’s time to employ macOS’s powerful Spotlight search. Use specific keywords from the file’s name or content. If Spotlight fails, you can perform a more thorough search directly in Finder by using the search field in the top-right corner of the window and narrowing the search scope to your entire Mac or your home folder, ensuring you haven’t accidentally saved the file elsewhere.
For users who work with a vast number of files, understanding the different view options in Finder can dramatically improve navigation. The Columns view (Command + 3) is particularly useful as it shows a hierarchical path to your selected file. The List view (Command + 2) allows you to sort files by name, date, size, and kind, making it easy to find, for instance, the largest files downloaded in the last week. Furthermore, using tags—color-coded labels available by right-clicking a file—can provide a visual organizational system that cuts across folder boundaries, allowing you to quickly group files from your Downloads folder with related files elsewhere on your system.
Power users and professionals often leverage automated workflows to handle downloads. Tools like Hazel, a third-party automation app, can watch your Downloads folder and automatically sort, rename, tag, or move files based on incredibly complex rules you define. This is ideal for users who download specific types of files regularly, such as invoices, client assets, or code libraries. For those comfortable with the command line, creating a simple shell script to archive or move files older than a certain number of days can be an effective way to maintain cleanliness without any manual intervention. Ultimately, mastering your Mac’s Downloads folder is about choosing the right combination of built-in features and personal habits that fit your workflow, turning a simple directory into a cornerstone of your digital organization.
Comparison of Methods to Access Downloads
The following table outlines the primary methods for accessing your downloaded files on a Mac, highlighting the best use cases for each approach to help you choose the most efficient method for any situation.
| Method | Steps | Best For | Speed |
|---|---|---|---|
| Finder Sidebar | Click Finder Dock icon, select ‘Downloads’ in left sidebar. | Routine, visual browsing and general file management. | Fast |
| Spotlight Search | Press Cmd+Space, type “Downloads” or filename, press Enter. | Finding the folder or a specific file instantly without mouse navigation. | Very Fast |
| Web Browser Link | Click downloads arrow in browser (e.g., Chrome’s arrow icon) and “Show in Finder”. | Immediately locating a file you just downloaded via your browser. | Fast |
| Terminal Command | Open Terminal, type `open ~/Downloads/`, press Enter. | Power users and developers who prefer command-line control. | Moderate |
Essential Tips for Managing Your Mac’s Downloads
Adopting a few key practices can completely transform your experience with downloaded files, keeping your system organized and efficient.
- Implement a “Download and Delete” Rule: Make it a non-negotiable habit to move files out of the Downloads folder immediately after you are done with them. This single practice prevents the folder from becoming a cluttered catch-all and forces you to consciously file documents where they belong.
- Leverage Smart Folders: Create a Smart Folder in Finder that aggregates all files downloaded in the last week. This provides a dynamic, auto-updating view of your recent activity, making it easy to review and process new files without wading through older ones.
- Change the Default Browser Setting Proactively: If you are starting a new project that involves heavy research or downloading, change your browser’s download location to a project-specific folder at the very beginning. This automatically sorts all incoming material, saving you hours of manual organization later.
- Use Tags for Cross-Project Files: When you download a file relevant to multiple projects, don’t duplicate it. Instead, apply colored tags from the Finder’s File menu. You can then search by tag across your entire Mac to find all related files, regardless of their physical location.
- Schedule a Monthly Clean-Up: Set a calendar reminder for the first of every month to open your Downloads folder, sort by “Date Added,” and delete anything you no longer need. This regular maintenance prevents digital hoarding and reclaims gigabytes of storage over time.
Mastering the simple task of finding and managing downloads is a cornerstone of digital literacy on the Mac platform. By moving beyond the basic sidebar access and embracing tools like Spotlight, Siri, and automated workflows, you can turn a mundane task into a seamless part of your creative or professional process. The flexibility to change the default download location empowers you to manage your storage intelligently, directing files to their logical homes from the moment they arrive. Remember that the goal is not just to find your files, but to create a system that supports your work and keeps your digital environment clean and purposeful. With these strategies and tips, your Downloads folder will forever cease to be a mystery and instead become a well-oiled component of your optimized Mac experience.
The evolution of macOS has consistently prioritized user-friendly file management, and the Downloads folder is a perfect example of this philosophy in action. While its location is standardized, the methods to access and control it are diverse, catering to users of all technical levels. From the intuitive click of a mouse to the precise syntax of a terminal command, Apple provides multiple pathways to achieve the same goal, ensuring that everyone can work in the way that suits them best. This flexibility, combined with a personal commitment to organization, ensures that you spend less time searching for your files and more time using them to create, learn, and accomplish your goals.
In conclusion, the question of “how to find downloads on a Mac” opens the door to a deeper understanding of macOS’s file system capabilities. It’s not merely about locating a single folder but about harnessing a suite of tools designed for efficiency and customization. Whether you are a student collecting research papers, a professional managing client assets, or a creative individual gathering inspiration, taking control of your download workflow is an essential skill. By applying the guidance outlined in this article—from using multiple access methods and changing default locations to implementing robust organization strategies—you can ensure that your downloaded files are always at your fingertips, precisely when and where you need them.
Full-stack developer at Scylla Technologies (USA), working remotely from Bangladesh. Adobe Certified Magento Developer.